Quick Start Guide
Get connected to your GateKey VPN in under 5 minutes.
Prerequisites
You need a VPN client installed on your machine:
OpenVPN Client
| Platform | Installation |
|---|---|
| macOS | brew install openvpn |
| Ubuntu/Debian | sudo apt install openvpn |
| Fedora | sudo dnf install openvpn |
| Windows | Download OpenVPN Connect |
WireGuard Client (Alternative)
| Platform | Installation |
|---|---|
| macOS | WireGuard App Store |
| Ubuntu/Debian | sudo apt install wireguard-tools |
| Fedora | sudo dnf install wireguard-tools |
| Windows | Download WireGuard |
Install the GateKey Client
Option 1: Homebrew (macOS/Linux)
brew tap dye-tech/gatekey
brew install gatekey
Option 2: Download Binary
# Linux (amd64)
curl -LO https://github.com/dye-tech/GateKey/releases/latest/download/gatekey-linux-amd64.tar.gz
tar -xzf gatekey-linux-amd64.tar.gz
sudo mv gatekey /usr/local/bin/

# macOS (Apple Silicon)
curl -LO https://github.com/dye-tech/GateKey/releases/latest/download/gatekey-darwin-arm64.tar.gz
tar -xzf gatekey-darwin-arm64.tar.gz
sudo mv gatekey /usr/local/bin/
Option 3: Build from Source
git clone https://github.com/dye-tech/GateKey.git
cd GateKey
make build-client
sudo cp bin/gatekey /usr/local/bin/
Connect to VPN
Step 1: Configure Your Server
Point the client at your company's GateKey server (run once):
gatekey config init --server https://vpn.yourcompany.com
Step 2: Login
Authenticate with your company credentials:
gatekey login
This opens your browser for SSO login (Okta, Azure AD, Google, etc.).
For servers without a browser, use --no-browser:
gatekey login --no-browser
# Copy the printed URL to a browser on another machine
Step 3: Connect
gatekey connect
That's it! You're connected.
Step 4: Check Status
gatekey status
Example output:
Status: Connected
Gateway:      us-east-1
Interface:    tun0
Connected at: 2024-01-15T10:30:00Z
Duration:     2h15m30s
Local IP:     10.8.0.5
Step 5: Disconnect
gatekey disconnect
What Just Happened?
gatekey login- Opened your browser to authenticate with your company's SSOgatekey connect- Downloaded a short-lived VPN config (valid ~24 hours) and connected- Your firewall rules were automatically applied based on your role/group membership
- Configs auto-refresh, so you never deal with expired certificates
Alternative: Web UI
If you prefer not to use the CLI, you can use the web interface.
Step 1: Login
Navigate to your GateKey server and authenticate with your identity provider:
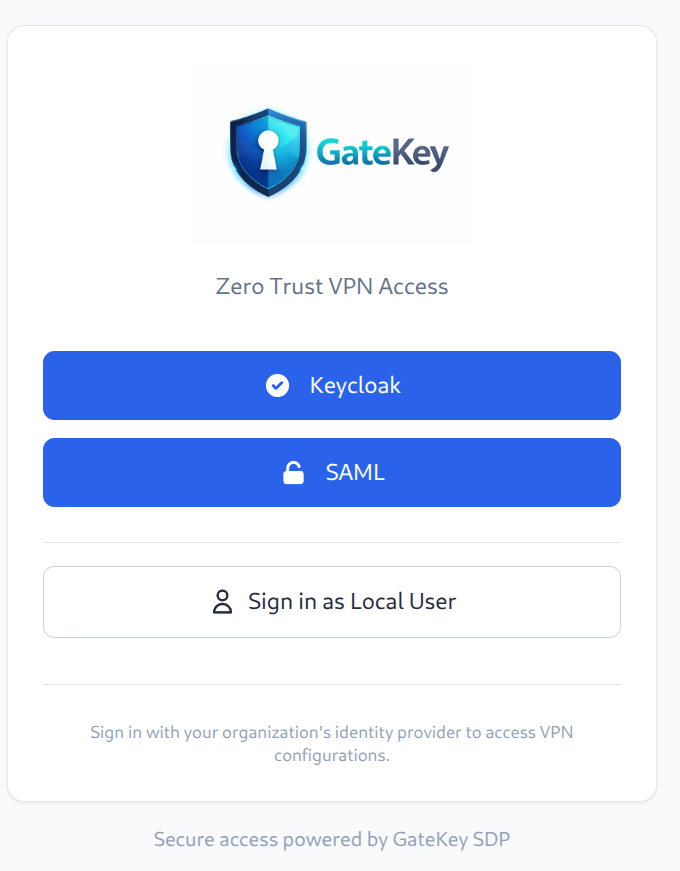
GateKey supports multiple SSO providers including Keycloak, SAML, and local authentication.
Step 2: Dashboard
After login, you'll see the dashboard with your available resources:

The dashboard shows:
- Stats - Gateways, networks, users, access rules, and proxy apps
- Quick Actions - Connect to VPN, mesh networks, web access
- Your Gateways - Available VPN gateways with status
- Your Mesh Networks - Hub-and-spoke mesh networks
- Your Web Apps - Clientless web access to internal applications
Step 3: Connect to VPN
Click "Connect to VPN" to see available gateways and connection instructions:
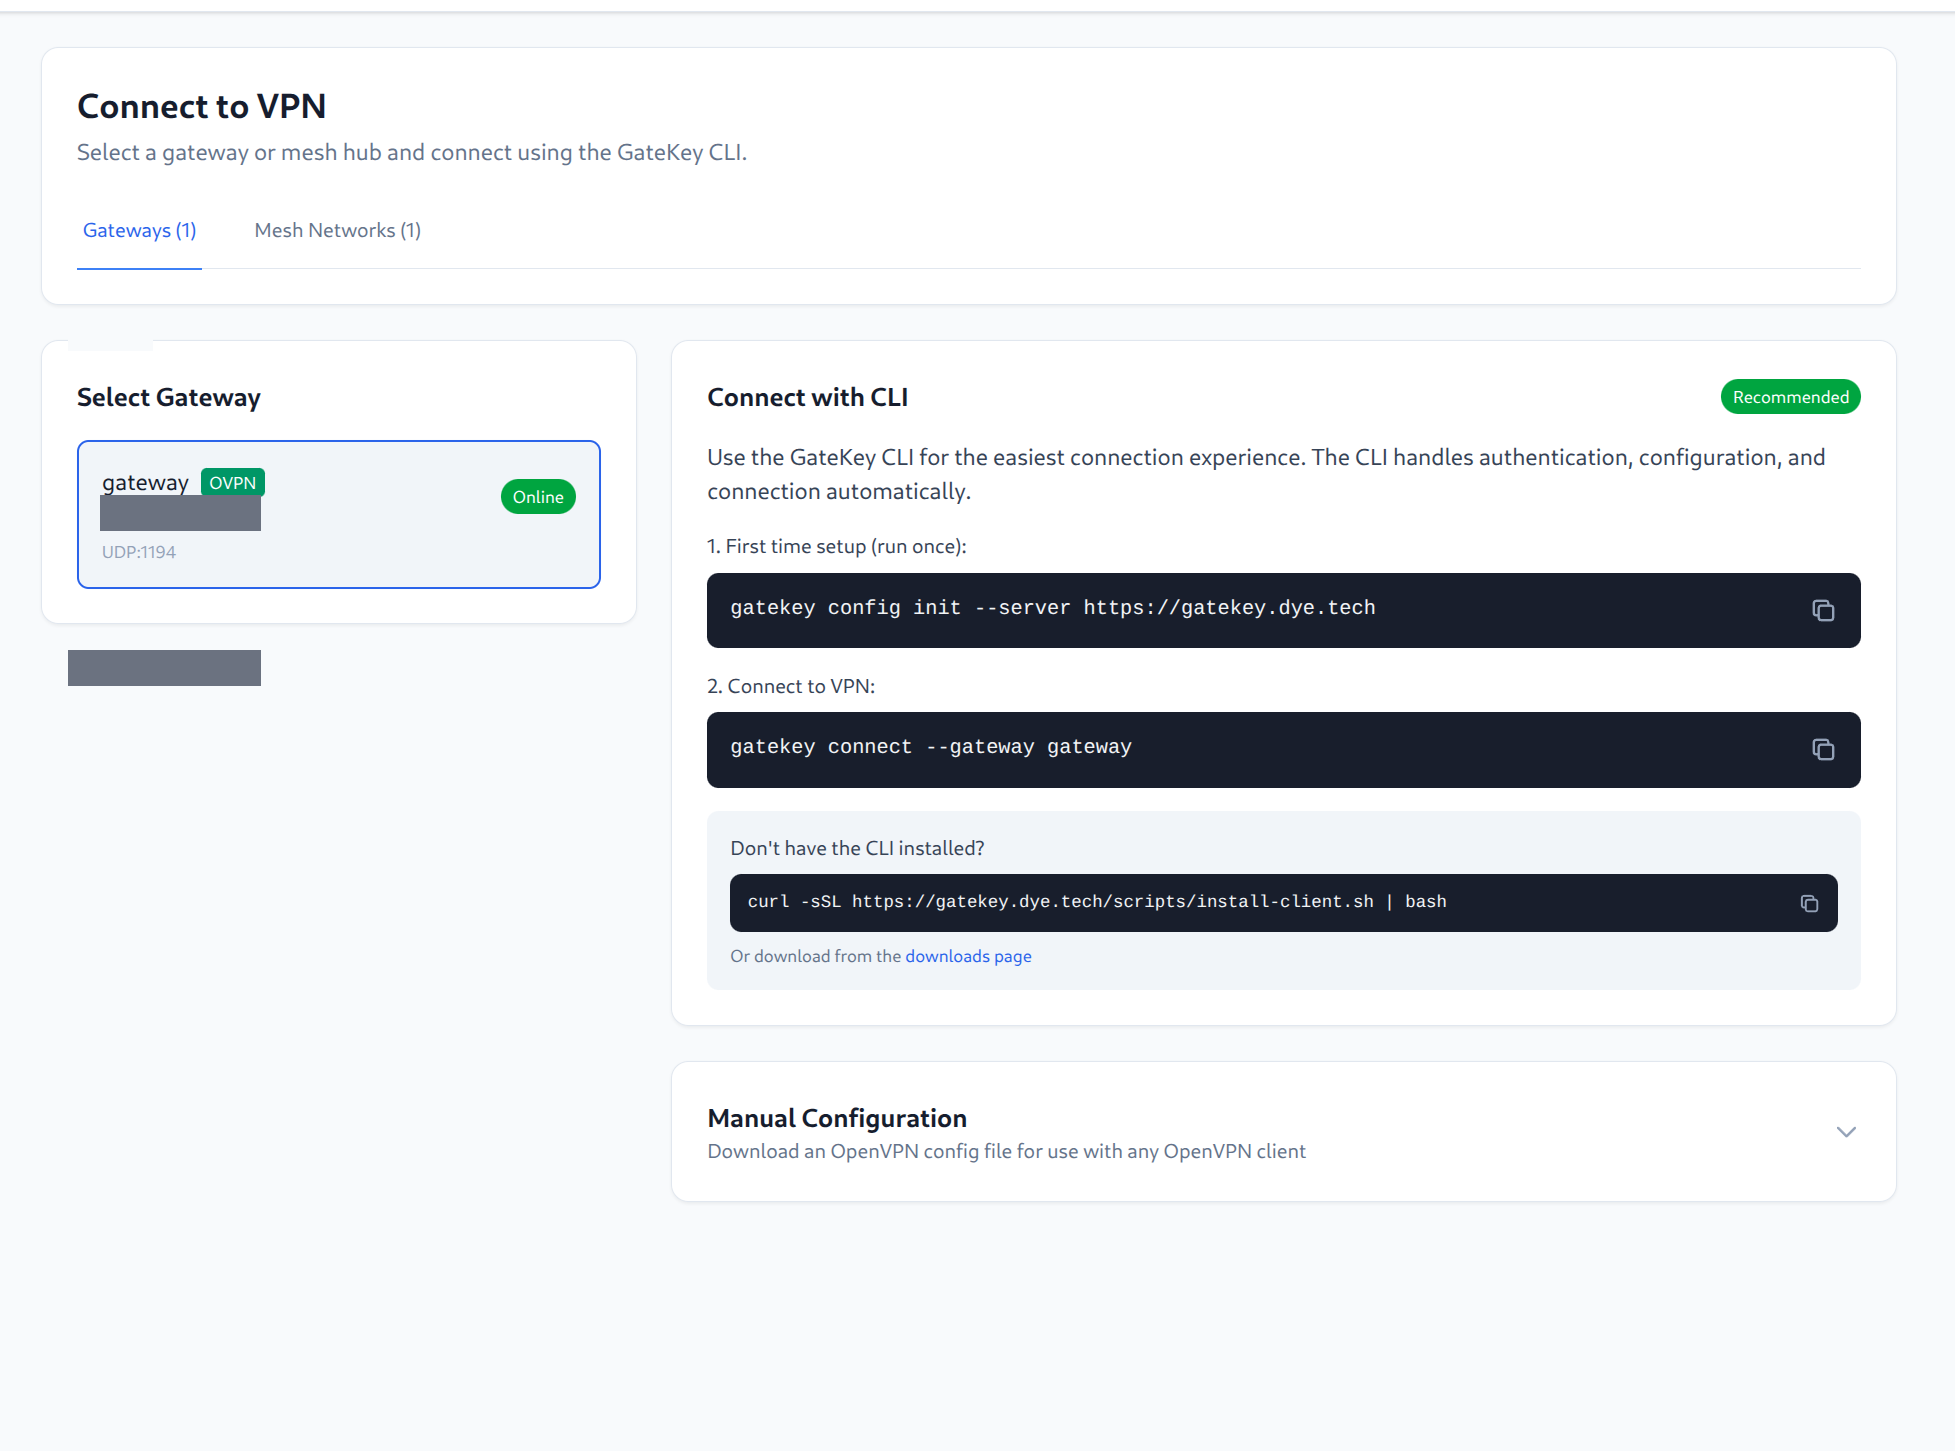
You can either:
- Use the CLI commands shown on the right (recommended)
- Download a manual configuration file for your VPN client
Video Demo
Watch a complete walkthrough of GateKey features:
Next Steps
- Client CLI Reference - All CLI commands
- Multi-Gateway Connections - Connect to multiple gateways
- Troubleshooting - Common issues and solutions